
1. 전달 내용
팀 to 강사
- 프로젝트 이름 (PN)
- Github Username
- Github Repository URLs (Deploy, Manifest)
- Github Personal Access Token
강사 to 팀
- 각 팀 ip주소:port번호
- sFTP 접속 비밀번호 (아이디: green)
/home/green/download 경로가 파일 업로드 Root 경로이다.
2. 적용 내용
FE URL: https://greenart.n-e.kr/${프로젝트 이름}
BE URL: https://greenart.n-e.kr/${프로젝트 이름}-api
3. FE
Deploy Repository 생성
개발용 Repository를 CI/CD 처리를 하면 오버헤드가 많이 발생할 수 있기 때문에 CI/CD 처리를 하고 싶을 때, 사용할 Repository를 생성한다.
이 Repository의 main branch에 push될 때 CI/CD가 작동된다.
Visual Studio Code (이하 VSC)에서 터미널 오픈
remote repository 추가
$ git remote add deploy ${github deploy repository url}
배포
$ git push deploy main
./vite.config.js
import { fileURLToPath, URL } from 'node:url'

import { defineConfig } from 'vite'
import vue from '@vitejs/plugin-vue'
import vueDevTools from 'vite-plugin-vue-devtools'

export default defineConfig({
  plugins: [
    vue(),
    vueDevTools(),
  ],
  resolve: {
    alias: {
      '@': fileURLToPath(new URL('./src', import.meta.url))
    },
  },
  base: '/${프로젝트 이름}/',
})
프로젝트 이름이 만약 'greengram' 이라면 defineConfig 속성에 base를 추가 하고 '/greengram/' 내용이 있어야 함.
./.env.production
VITE_BASE_URL=https://greenart.n-e.kr/${프로젝트 이름}-api
./src/services/httpRequester.js
...(생략)

axios.defaults.baseURL = `${import.meta.env.VITE_BASE_URL}/api/`;
axios.defaults.withCredentials = true;

...(생략)
위 내용이 반드시 있어야 하고 다른 서비스들은 꼭 httpRequester.js를 상속받아서 사용해야 한다.
./default.conf
server {
  listen 80;
  server_name localhost;

  root /etc/nginx/html;
  index index.html;

  location / {
    try_files $uri /index.html;
  }
}
FE 도커 이미지에서 기동되는 nginx 웹서버 세팅 파일
./Dockerfile
# Build stage
FROM node:20.14.0 AS build-stage
WORKDIR /app
COPY package*.json ./
RUN npm install
COPY . .
RUN npm run build

# Production stage
FROM nginx:stable-alpine

# Add our custom nginx config
COPY default.conf /etc/nginx/conf.d/

COPY --from=build-stage /app/dist /etc/nginx/html
EXPOSE 80
CMD ["nginx", "-g", "daemon off;"]
Jenkins에서 Kaniko를 활용해 도커 이미지를 만드는데 그 때 이 Dockerfile을 활용한다.
도커 이미지가 Pod로 실행될 때 nginx 웹서버를 활용하는데 이 때 위에서 작성한 default.conf 파일로 웹 서버 세팅을 한다.
4. BE
Redis
혹시 Redis를 사용한다면 application.yaml 파일에 아래 내용을 꼭 추가하길 바란다.
공용으로 쓰는 redis이니 key값은 중복되지 않게 prefix로 프로젝트명을 사용하길 바란다.
예를 들어 프로젝트명이 greengram이고 속성명으로 name으로 사용하고 싶다면
greengram-name으로 key값을 만들어 중복을 피하자.
  data:
    redis:
      host: 192.168.0.120
      port: 6379
      password: green502
Deploy Repository 생성
개발용 Repository를 CI/CD 처리를 하면 오버헤드가 많이 발생할 수 있기 때문에 CI/CD 처리를 하고 싶을 때, 사용할 Repository를 생성한다.
이 Repository의 main branch에 push될 때 CI/CD가 작동된다.
(IntelliJ 메뉴) Git > Manage Remotes... 선택

deploy에 push를 하고 싶을 때, (IntelliJ 메뉴) Git > Push 선택


Manifest Repository 생성
CI/CD를 할 때 필요한 Manifest 내용이 포함된 Repository를 생성하고 Visual Studio Code로 연동한다. 아래 저장소를 참조한다.
https://github.com/sbsteacher/2025-01-msa_greengram-cluster
GitHub - sbsteacher/2025-01-msa_greengram-cluster
Contribute to sbsteacher/2025-01-msa_greengram-cluster development by creating an account on GitHub.
github.com
주의사항: name 값에 소문자 알파벳(a-z), 숫자(0-9), 하이픈(-)만 사용할 수 있음
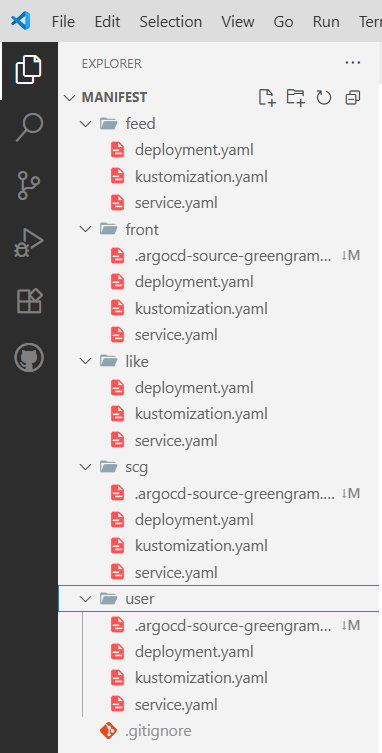
각 Application 전용 폴더를 생성한다. 각 폴더 아래에 deployment.yaml, kustomization.yaml, service.yaml 파일을 생성한다.
deployment: 배포 정보
service: 네트워크 정보
kustomization: 리소스 정보
각 폴더에 .argocd-source-*.yaml 파일은 CI/CD 처리 때 자동으로 생성된다. 수정할 내용이 없다면 Pull 받지 않아도 되지만 수정 내용이 있다면 수정 전에 꼭 Pull을 받고 Push 작업을 한다.
내용에 실수가 없다면 최초 한 번만 Push하고 그 다음부터는 Push할 일이 없다.
공통사항
kustomization.yaml
resources:
  - deployment.yaml
  - service.yaml
Spring Cloud Gateway Manifest
./scg/deployment.yaml
apiVersion: apps/v1
kind: Deployment
metadata:
  name: scg-app-deployment
spec:
  replicas: 1
  selector:
    matchLabels:
      app: scg-app
  template:
    metadata:
      labels:
        app: scg-app
    spec:
      containers:
      - name: scg-app
        image: harbor.greenart.n-e.kr/${프로젝트 이름}/scg:1
        ports:
        - containerPort: 8080
      imagePullSecrets:
      - name: harbor-creds
      serviceAccountName: spring-gateway
프로젝트명, 서비스명만 수정한다.
./scg/service.yaml
apiVersion: v1
kind: Service
metadata:
  name: scg-app-service
  namespace: app
spec:
  selector:
    app: scg-app
  ports:
    - name: http
      protocol: TCP
      port: 8080
      targetPort: 8080
      nodePort: 30880
  type: NodePort
쿠버네티스 Pod에 접근할 수 있는 네트워크를 만드는 파일
Front Manifest
./front/deployment.yaml
apiVersion: apps/v1
kind: Deployment
metadata:
  name: front-app-deployment
spec:
  replicas: 1
  selector:
    matchLabels:
      app: front-app
  template:
    metadata:
      labels:
        app: front-app
    spec:
      containers:
      - name: front-app
        image: harbor.greenart.n-e.kr/${프로젝트 이름}/front:1
        ports:
        - containerPort: 80
      imagePullSecrets:
      - name: harbor-creds
      serviceAccountName: spring-gateway
./front/service.yaml
apiVersion: v1
kind: Service
metadata:
  name: front-app-service
  namespace: app
spec:
  selector:
    app: front-app
  ports:
    - name: http
      protocol: TCP
      port: 80
      targetPort: 80
      nodePort: 30890
  type: NodePort
Application Service Manifest
./feed/deployment.yaml
apiVersion: apps/v1
kind: Deployment
metadata:
  name: ${프로젝트 이름}-${서비스 이름}-deployment
spec:
  replicas: 1
  selector:
    matchLabels:
      app: ${프로젝트 이름}-${서비스 이름}
  template:
    metadata:
      labels:
        app: ${프로젝트 이름}-${서비스 이름}
    spec:
      terminationGracePeriodSeconds: 30  # Spring이 종료될 시간 확보
      containers:
      - name: ${프로젝트 이름}-${서비스 이름}
        image: harbor.greenart.n-e.kr/${프로젝트 이름}/${서비스 이름}:1
        lifecycle:
            preStop:
              exec:
                command: [ "sh", "-c", "sleep 10" ] # kube-proxy에서 트래픽 우회할 시간 확보
        ports:
          - containerPort: 8080
        volumeMounts:
          - name: host-volume
            mountPath: /home/download
      volumes:
        - name: host-volume
          hostPath:
            path: /home/green/download
            type: DirectoryOrCreate
      imagePullSecrets:
      - name: harbor-creds
      serviceAccountName: spring-gateway
파일 업로드 기능이 있다면 spec.template.spec.volumeMounts, spec.template.spec.volumes 내용이 있어야 합니다.
./feed/service.yaml
apiVersion: v1
kind: Service
metadata:
  name: ${프로젝트 이름}-${서비스 이름}
  namespace: app
  labels:
    app: ${프로젝트 이름}-${서비스 이름}
spec:
  selector:
    app: ${프로젝트 이름}-${서비스 이름}
  ports:
    - name: http
      protocol: TCP
      port: 8080
      targetPort: 8080
  type: ClusterIP
metadata.name 값이 로드밸런싱 주소가 된다.
Github Personal Access Token 발행받기


아래 화면이 나타난다.

Token name: 토큰 이름 (임의 선택)
Expiration: 6개월 이상 or No expiration 선택
MSA 프로젝트는 수료 후 약 6개월 정도 유지될 수 있다.

[ Select repositories ]를 클릭하여 FrontEnd, SCG, Services, Manifest Repository를 모두 선택한다.
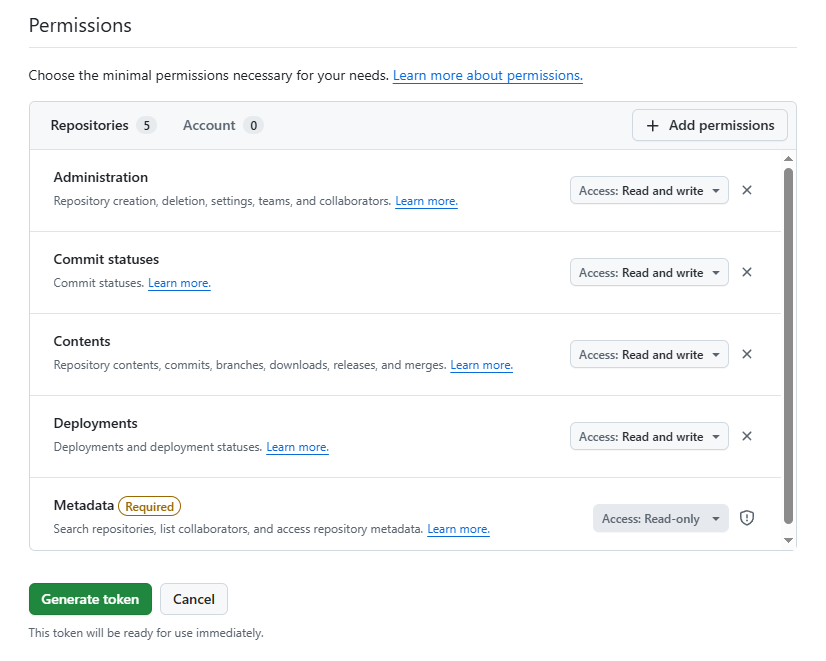
[ + Add permissions ] 버튼을 클릭하여 Administration, Commit statuses, Contents, Deployments 4개의 권한을 선택한다.
4개 권한의 Access는 모두 "Read and write"로 변경한다.
[ Generate token ] 버튼을 클릭한다.
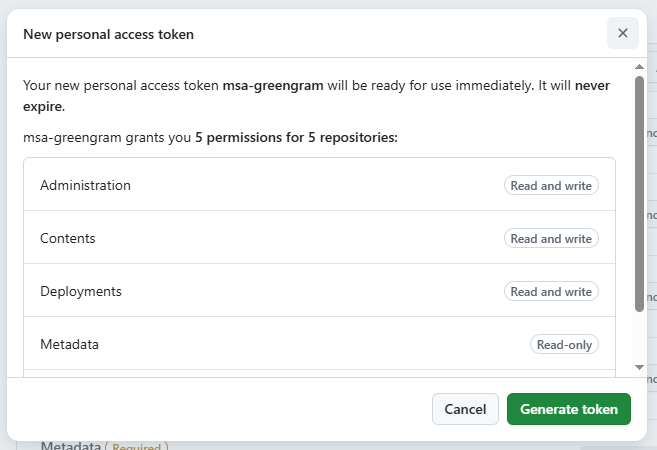

Token값을 유일하게 복사할 수 있는 화면이 나타난다. 이때 복사하지 못하면 다시 PAT를 생성해야 한다. [ 복사 ] 버튼을 클릭하여 클립보드에 복사한 후 따로 보관한다.

다시 이 화면으로 접근해보면 이제는 Token값을 볼 수 없고 삭제만 가능하다.

모든 프로젝트 공통 설정
./settings.gradle
rootProject.name = 'app'
rootProject.name = 'app' 으로 수정하고 꼭, 코끼리를 클릭하여 Gralde Refresh 처리를 해준다.
Jar파일을 만들 때 ./build/libs/ 폴더 아래에 jar파일의 파일명이 app-0.0.01-SNAPSHOT.jar 파일로 만들어진다.
./Dockerfile
FROM amazoncorretto:21-alpine

WORKDIR /deploy

COPY build/libs/app-0.0.1-SNAPSHOT.jar app.jar

RUN apk add tzdata && ln -snf /usr/share/zoneinfo/Asia/Seoul /etc/localtime

ENV TZ=Asia/Seoul

CMD ["java", "-jar", "-Duser.timezone=Asia/Seoul", "/deploy/app.jar", "--spring.profiles.active=prod"]

EXPOSE 8080
Dockerfile은 Jenkins에서 프로젝트를 Gradle을 이용해서 build하고 Kaniko를 이용하여 Docker Image를 만들 때 사용된다. 이 때 build 된 jar 파일명이 app-0.0.1-SNAPSHOT.jar 파일을 복사한다고 되어있다.
Spring Cloud Gateway Project 설정
./src/main/resources/application-prod.yaml
eureka:
  client:
    enabled: false

spring:
  cloud:
    kubernetes:
      discovery:
        enabled: true
      reload:
        enabled: true
        strategy: refresh
    gateway:
      server:
        webflux:
          discovery:
            locator:
              enabled: true
              lower-case-service-id: true
          routes:
            - id: user
              uri: lb://greengram-user
              predicates:
                - Path=/api/user/**, /pic/profile/**

            - id: feed
              uri: lb://greengram-feed
              predicates:
                - Path=/api/feed, /api/feed/comment, /pic/feed/**

            - id: like
              uri: lb://greengram-like
              predicates:
                - Path=/api/feed/like
spring.cloud.gateway.server.webflux.routes 속성의 id, uri, predicates는 각 팀의 경로에 맞게 수정한다.
"lb://${서비스 이름}"은 Manifest Service의 name값이다.
쿠버네티스에서 돌아가는 모든 프로젝트는 8080 포트로 연동되게 세팅되었기 때문에 혹시 기본 설정에서 포트가 8080으로 되어있지 않다면 server.port = 8080을 추가해 주어야 한다.
./build.gradle
// 필수 포함
implementation 'org.springframework.cloud:spring-cloud-starter-kubernetes-client'
implementation 'org.springframework.boot:spring-boot-starter-actuator'
implementation 'org.springframework.cloud:spring-cloud-starter-gateway-server-webflux'
Application Service Spring Project 설정
./src/main/resources/application-prod.yaml
constants:
  file:
    upload-directory: /home/download

eureka:
  client:
    enabled: false

server:
  port: 8080

management:
  endpoint:
    health:
      show-details: always
  endpoints:
    web:
      exposure:
        include: "*"

spring:
  cloud:
    kubernetes:
      discovery:
        enabled: true
      reload:
        enabled: true
        strategy: refresh
  datasource:
    url: jdbc:log4jdbc:mariadb://${각 팀 서버 ip주소}/${Database 이름}
    hikari:
      maximum-pool-size: 20
      minimum-idle: 5
      idle-timeout: 300000     # 5분
      max-lifetime: 1800000    # 30분
      connection-timeout: 30000
  jpa:
    hibernate:
      ddl-auto: update
  lifecycle:
    timeout-per-shutdown-phase: 30s  # Pod 종료 대기 시간
파일 업로드 기능이 있다면 constants.file.upload-directory와 ConstFile, WebMvcConfiguration이 필요하다.
쿠버네티스에서 돌아가는 모든 프로젝트는 8080 포트로 연동되게 세팅되어있다. Local에서 개발할 때는 port번호가 다를 것이기 때문에 server.port = 8080을 꼭 추가해 주어야 한다.
@ConfigurationProperties(prefix = "constants.file")
@RequiredArgsConstructor
@ToString
public class ConstFile {
    public final String uploadDirectory;
    public final String feedPic;
    public final int maxPicCount;
}
@Slf4j
@Configuration //빈등록
@RequiredArgsConstructor
public class WebMvcConfiguration implements WebMvcConfigurer {
private final ConstFile constFile;
@Override
public void addResourceHandlers(ResourceHandlerRegistry registry) {
registry.addResourceHandler("/pic/**")
.addResourceLocations("file:" + constFile.uploadDirectory);
}
...(생략)
}
./build.gradle
// 필수포함
implementation 'org.springframework.cloud:spring-cloud-starter-kubernetes-client'
implementation 'org.springframework.boot:spring-boot-starter-actuator'
Auth Service Spring Project 설정
CookieUtils.java
package com.green.greengram.configuration.util;

import jakarta.servlet.http.Cookie;
import jakarta.servlet.http.HttpServletRequest;
import jakarta.servlet.http.HttpServletResponse;
import lombok.RequiredArgsConstructor;
import lombok.extern.slf4j.Slf4j;

import org.springframework.core.env.Environment;
import org.springframework.http.HttpHeaders;
import org.springframework.http.ResponseCookie;
import org.springframework.stereotype.Component;
import org.springframework.util.SerializationUtils;

import java.util.Arrays;
import java.util.Base64;

//쿠키에 데이터 담고 빼고 할 때 사용하는 객체
@Slf4j
@Component //빈등록
@RequiredArgsConstructor
public class CookieUtils {
    private final Environment environment; //실행되는 프로파일 정보를 얻기 위한 객체 DI

    public void setCookie(HttpServletResponse res, String name, Object value, int maxAge, String path, String domain) {
        this.setCookie(res, name, serializeObject(value), maxAge, path, domain);
    }

    /*
    response: 쿠키를 담을 때 필요함
    name: 쿠키에 담을 벨류의 레이블(키값)
    value: 쿠키에 담을 벨류
    maxAge: 쿠키에 담긴 벨류의 유효 기간
    path: 설정한 경로에 요청이 갈 때만 쿠키가 전달된다.
     */
    public void setCookie(HttpServletResponse response, String name, String value, int maxAge, String path, String domain) {
        /*
            쿠버네티스에서 실행되면 프로파일 2개로 실행(prod, kubernetes)
            prod는 도커 이미지를 만들 때 실행명령어에 prod로 서버를 기동하라는 내용 포함되어 있음
            kubernetes는 쿠버네티스가 서버 기동할 때 포함 시킴
         */
        String[] activeProfiles = environment.getActiveProfiles();

        if(domain != null && Arrays.asList(activeProfiles).contains("prod")) { //프로파일에 prod가 포함되어 있는지 확인
            //쿠키 생성 방법 (1) ResponseCookie.from 스태틱 메소드 이용
            log.info("CookieUtils - 프로파일에 prod가 있음");
            ResponseCookie cookie = ResponseCookie.from(name, value)
                    .path(path)
                    .maxAge(maxAge)
                    .httpOnly(true)
                    .domain(domain)
                    .secure(true) //https일 때만 쿠키 전송된다.
                    .build();

            response.addHeader(HttpHeaders.SET_COOKIE, cookie.toString());
        } else {
            //쿠키 생성 방법 (2) Cookie 객체 생성
            log.info("CookieUtils - 기본 프로파일");
            Cookie cookie = new Cookie(name, value);
            cookie.setPath(path);
            cookie.setMaxAge(maxAge);
            cookie.setHttpOnly(true); //보안 쿠키 설정
            response.addCookie(cookie);
        }
    }

    public String getValue(HttpServletRequest request, String name) {
        Cookie cookie = getCookie(request, name);
        if(cookie == null) { return null; }
        return cookie.getValue();
    }

    public <T> T getValue(HttpServletRequest req, String name, Class<T> valueType) {
        Cookie cookie = getCookie(req, name);
        if (cookie == null) { return null; }
        if(valueType == String.class) {
            return (T) cookie.getValue();
        }
        return deserializeCookie(cookie, valueType);
    }

    private String serializeObject(Object obj) {
        return Base64.getUrlEncoder().encodeToString( SerializationUtils.serialize(obj) );
    }

    //역직렬화, 문자열값을 객체로 변환
    private <T> T deserializeCookie(Cookie cookie, Class<T> valueType) {
        return valueType.cast(
                SerializationUtils.deserialize( Base64.getUrlDecoder().decode(cookie.getValue()) )
        );
    }

    private Cookie getCookie(HttpServletRequest request, String name) {
        Cookie[] cookies = request.getCookies(); //쿠키가 req에 여러개가 있을 수 있기 때문에 배열로 리턴

        if (cookies != null && cookies.length > 0) { //쿠키에 뭔가 담겨져 있다면
            for (Cookie cookie : cookies) {
                if (cookie.getName().equals(name)) { //쿠키에 담긴 이름이 같은게 있다면
                    return cookie; //해당 쿠키를 리턴
                }
            }
        }
        return null;
    }

    public void deleteCookie(HttpServletResponse response, String name, String path, String domain) {
        setCookie(response, name, null, 0, path, domain);
    }
}
application-prod.yaml
constants:
  file:
    upload-directory: /home/download
  jwt:
    refresh-token-cookie-path: /${프로젝트 이름}-api/${reissue url}
쿠버네티스에서 실행되는 서버에서 쿠키를 만들 때는 domain, secure 설정이 꼭 되어야 한다. 그리고 Refresh Token Path설정은 applicaion-prod.yaml처럼 수정해주어야 한다.
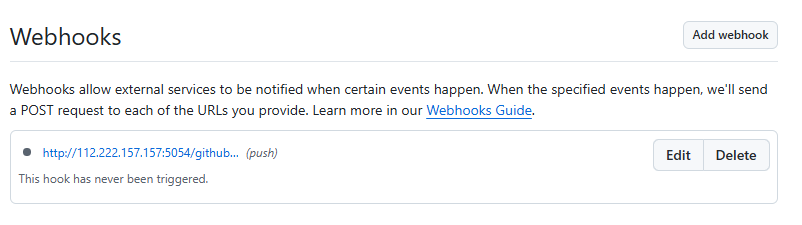
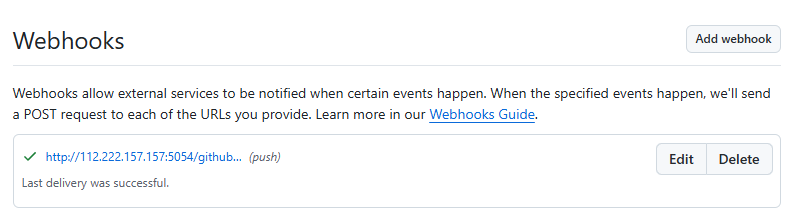
Repository Webhook 설정
모든 repository를 webhook 작업을 해주어야한다. 프로젝트를 push해서 main branch가 수정되면 CI/CD가 작동된다.


Payload URL: http://112.222.157.157:${각 팀 포트 번호}/github-webhook/
Content type: application/json
Secret: 빈칸
SSL verification: (select) Disable (not recommended)
모달창 나타나면 [ Disable, I understand my webhooks may not be secure ] 선택

Which evnets would you like to trigger this webhook?: (select) Just the push event.
Active: (check)
[ Add webhook ] 클릭
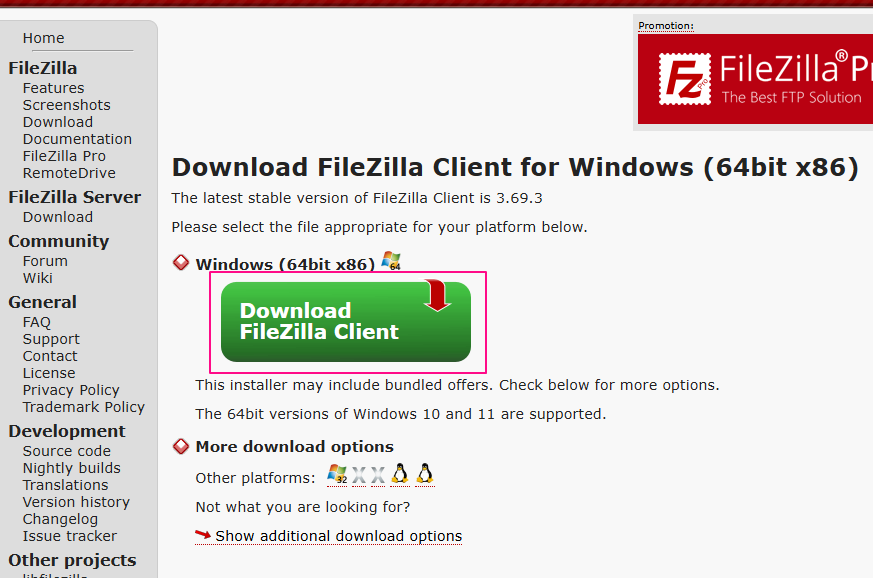
5. sFTP
FileZilla 다운로드 및 설치
https://filezilla-project.org/

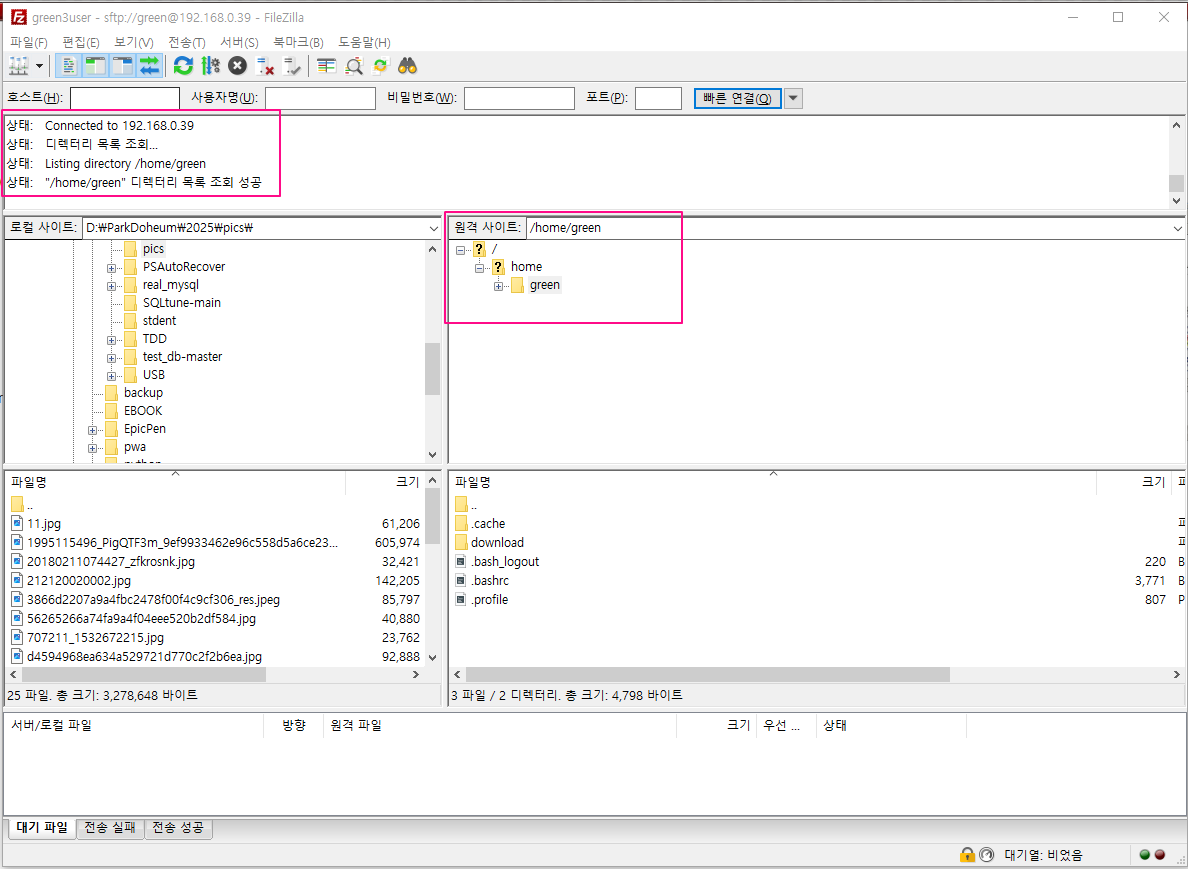
접속 정보 저장


[ 새 사이트 ] 메뉴를 클릭, 사이트 이름 변경
호스트(H): 접속 IP 주소
사용자(U): green
비밀번호(W): 각 팀 접속 비밀번호
[ 확인 ] 버튼을 클릭
[ 사이트 관리자 ] 메뉴를 다시 클릭하고, 원하는 사이트 선택 후 [ 연결 ] 버튼을 클릭

6. 각 팀 ReadOnly - Jenkins, ArgoCD 접속 방법
Jenkins: http://{각 팀 ip주소}:30080
ArgoCD: http://{각 팀 ip주소}:30081
'MSA > DevOps' 카테고리의 다른 글
| [#2] Jenkins(젠킨스) - Slack(슬랙) 연동 (0) | 2025.10.02 |
|---|---|
| [#1] Jenkins(젠킨스) - Slack(슬랙) 연동 (0) | 2025.10.02 |
| [Jenkins] 젠킨스 한국 시간 설정 (1) | 2025.07.22 |
| FE - Github 협업 (0) | 2025.07.15 |
| BE - Github 협업 (0) | 2025.07.14 |


